Pillar Task
Research
A pillar is defined as a vertical structure, used as support for a building, or as an ornament/monument. I wanted to have an animal within the pillar, but for it also to serve the purpose of supporting a building. I began researching animals, until I came across panda's, where I settled and began sketching ideas. The panda needed to sit within the pillar and still be a strong support. Panda's being native to China, made me want to design other aspects of the pillar with a style similar to theirs. This pillar would be situated in a gallery or doorway to a building china.

Sketching out various panda's sitting, I could understand their anatomy and feel more comfortable about modelling it accurately.
Google image searches on Chinese architecture helped me understand their style, and look at patterns. Using the traditional style or China, I sketched my own ideas for the pillar that will support the panda.


SKETCHES PHOTOGRAPH
I began blocking out a low poly version of my panda and the pillar around it. Maya was appropriate for the pillar, however the Panda would have been easier starting from ZBrush.


This is the composition of my pillar, blocked out in Maya and soon to be imported to ZBrush to make more detailed.


I exported each part of the model to ZBrush to add wear and tear and engrave Chinese patterns. However, I remodeled the panda in Zbrush using ZSpheres; making it easier to manipulate the panda's anatomy before going into more detail, and allowing me to make sure the anatomy is correct. Feedback I recieved from my original panda model in Maya was that the neck was too long and to re visit pictures of their anatomy. As I had already modeled the panda in Maya, remodeling didn't take as long and I managed to adjust the neck length and legs to suit the panda. Whilst modeling, I kept referring back to google search images of the panda so I could study various angles of the sitting animal.
High Poly Model
A few days into using ZBrush I had modeled the high poly. For a more realistic look, I did not use symmetry for the panda. I created an alpha to help make the fur pattern on the panda. The pillar is concrete based so I did not want an alpha to replicate fur, but how it would be engraved in a pillar. I didn't often increase the resolution whilst modelling, so need to consider this more next time to get nice crisp details where wanted.


Low Poly Model


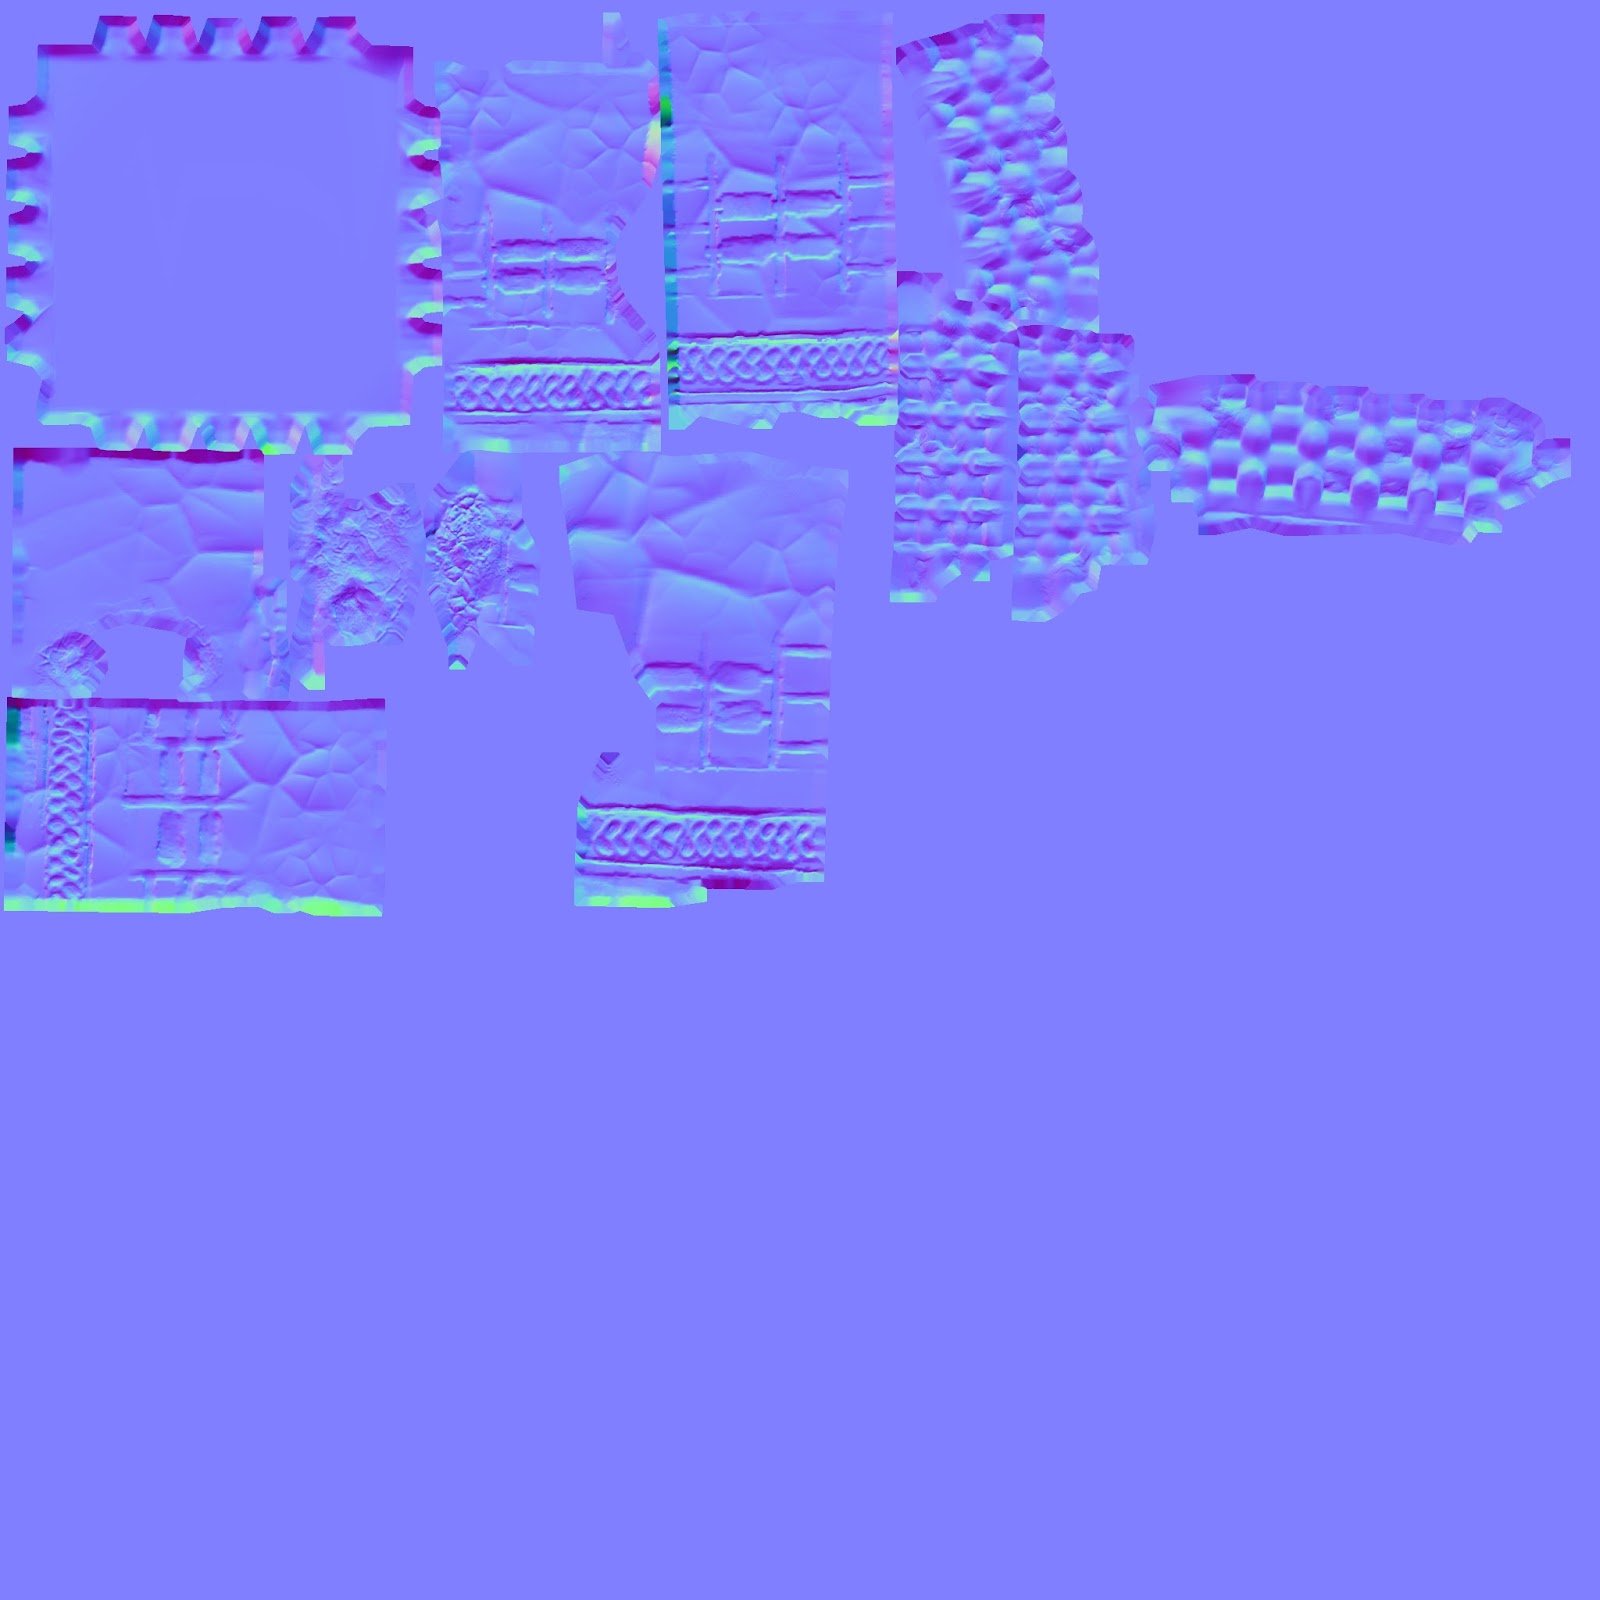
Baking
LOW/HIGH/CAGE SHOT

UE4


Time Machine
The final project is to create a time machine. The definition of one is 'a machine capable of transporting a person backwards or forwards in time'. I wanted to create something animal based, so settled on the idea of a turtle. Rather than a living turtle, it will be a turtle ornament as such, that would appear in a level like a port key, and had the capability of transporting people back and forth in time. I then began to think how it would work, and through feedback I decided that the shell contains hand prints, in which the character must place there hand on and once the middle symbol of some kind was pressed, the machine would activate. I began by analyzing a turtles structure.


Using gradient maps as learnt through other sessions, I altered the colours of this turtle image to explore colours and moods for the time machine. I particularly liked the glowing effect from the saturated yellow/green in the bottom right.

High Poly Model
I created the shell in Maya, and imported this to Zbrush to make it more uneven, bulky looking and engrave the shell markings. Once the shell size was certain, I used Zspheres to create the turtle. I found symmetry good for Zspheres but when something was slightly unsymmetrical it caused problems when further trying to model. I should have made all markings before making the model unsymmetrical, as when adjusting to shapes towards the end symmetry didn't allow me to move the same areas on each side.

I created an alpha within Photoshop for the hand print on the shell.


Low Poly Model
To get the low poly model, I decimated the turtle base within Zbrush and imported this into Maya. The topology could be improved a lot but this still kept the shape enough to bake normal maps and was within the 10K maximum of triangles (including the shell).

The shell was altered too much in Zbrush that i couldn't use the original Maya shell model for the low poly. Next time I will ensure to create the Maya file as accurate as possible and only use Zbrush for extra smaller details, then I could use the low poly from the original Maya file. Again, I decimated within Zbrush and import it into Maya.


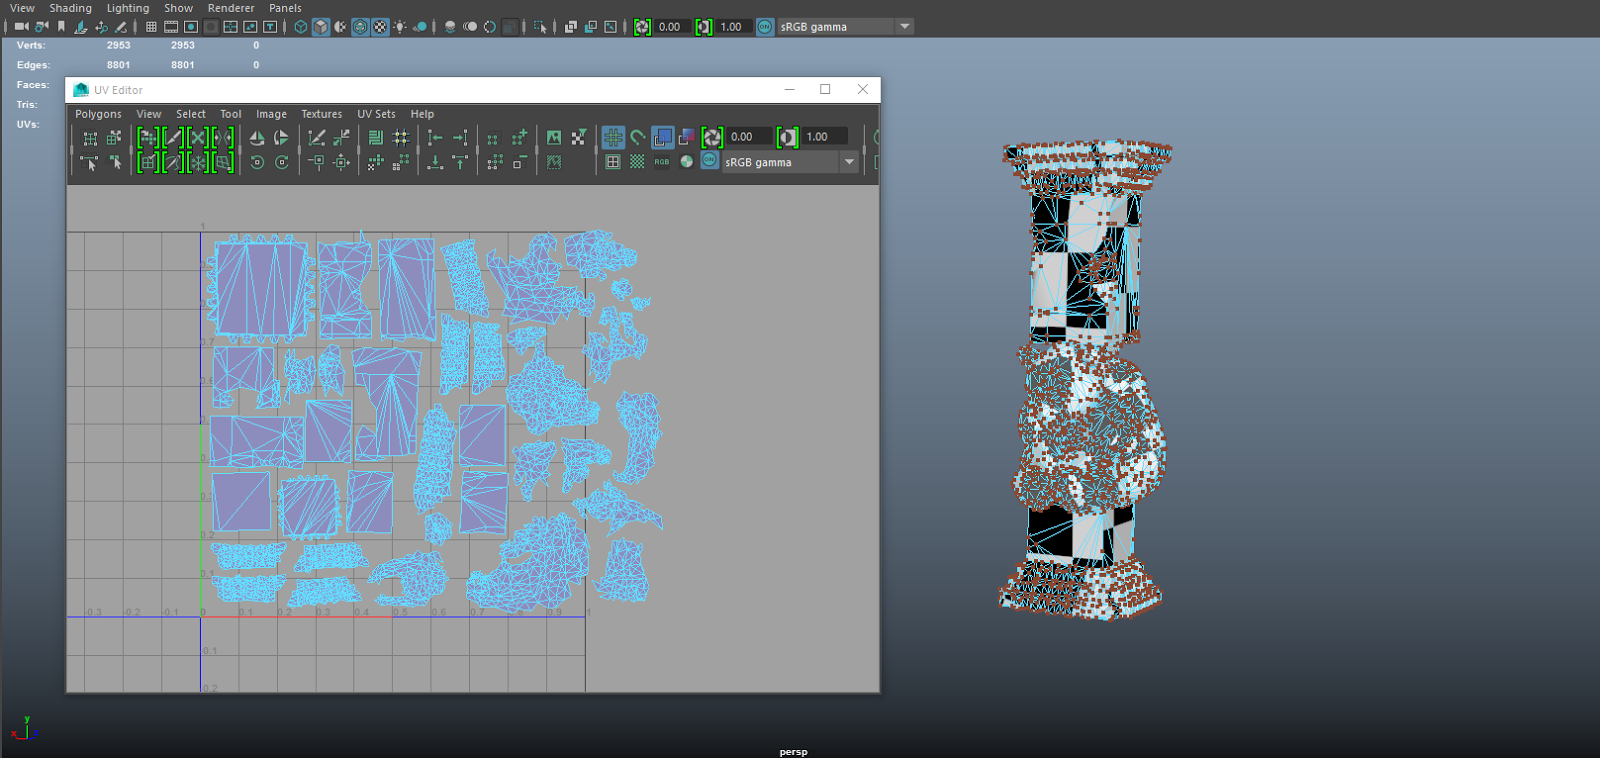
These UV's clearly show what the model is, and is made up of only 5 UV's islands. The seams however could be placed better if I consider how the object will sit within an environment. The underside will be shown less or even hidden, so I could've explored putting them there rather than on the sides, however this could have made more UV's islands, and therefor more seams.

Maps


UE4 Testing
Plain albedo, whilst experimenting with emissives.


Hand-Painted textures trial before using substance.


Substance Textures


